
The #1 App In 2017 For Timing The American Total Solar Eclipse!


Horizon Imaging
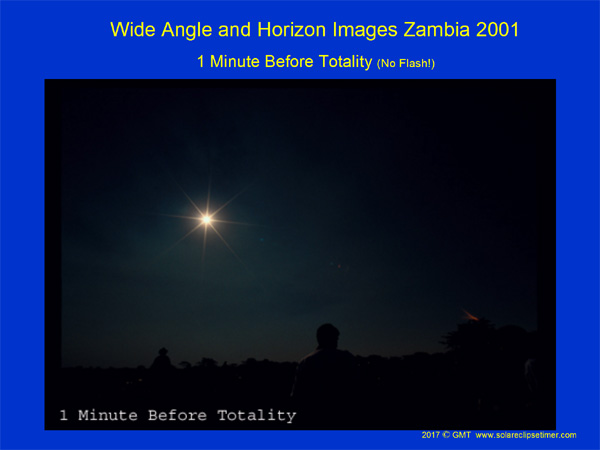
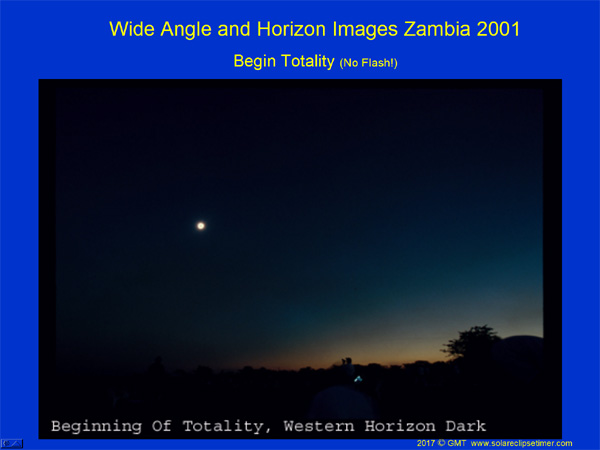
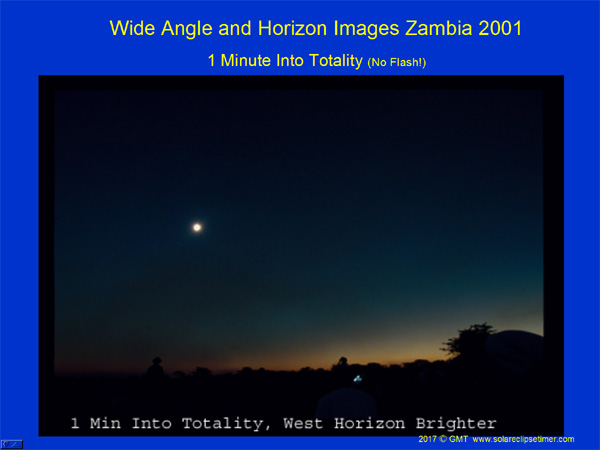
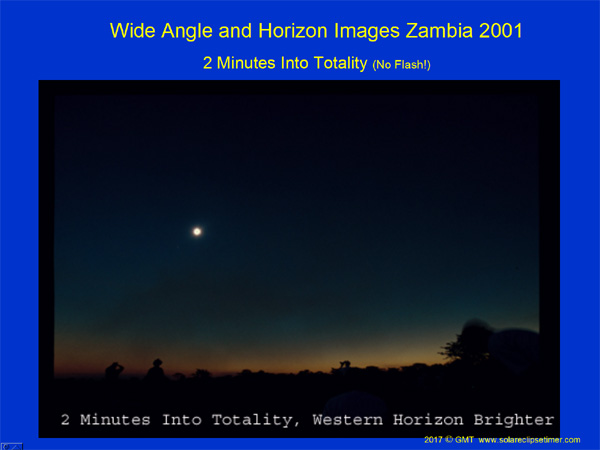
With this post, I am going to discuss how to prepare in advance to capture images of the horizon during totality. The horizon during totality is beautiful! You are standing in the middle of the shadow, which is only about 70 miles in diameter (for 2017), and the Sun is lighting the entire perimeter. So there is the appearance of a colored sunset 360 degrees around you. During totality it is not dark like night time, it's more like 25 to 35 minutes after the Sun goes over the horizon, the zenith is dark, but there is a glow coming from the perimeter. Remember NO FLASH!
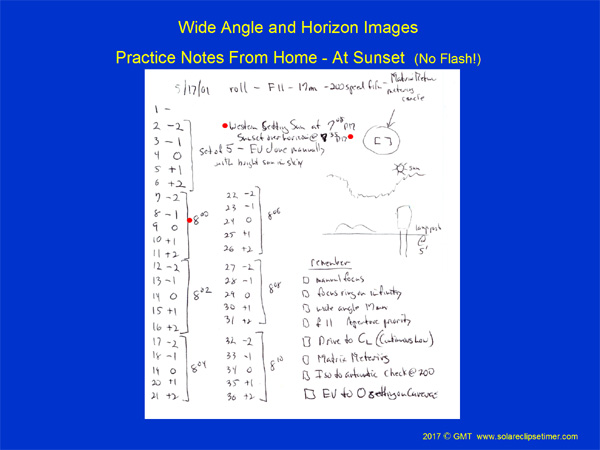
Therefore, the way you practice now for your exposures for the horizon is to go outside now, on a clear day and practice exposures of the Western setting Sun. If you have a camera that can do automatic bracketing of the exposure by either shutter speed or ev's, learn how to set that up. This is the optimal camera to try to completely put on auto-pilot! It is nice not to have to fool with this during totality. Try to have the camera take shots at pre-set intervals starting about 3 minutes before totality, during totality and right after totality.
In Zambia, in 2001 I had a film SLR with a 17mm wide angle lens set up behind us. That camera had an optional multifunction back that was an intervalometer. So I just had to remember to turn the camera on at a certain time prior to C2 and the camera would begin to fire shots after a preset delay. It worked great.
But the issue is, you have to use manual mode and determine what exposure settings you are going to use ahead of time. You don't want to use automatic camera settings because the camera will continue to try to change its settings to gather more light. You DO NOT want the camera to try to use a flash because it is sensing that there is less light available. NO FLASH during totality; Shut It OFF; Tape It Down; Put Black Electrical Tape Over It.
You want manual exposure, so you can document the change to darkness. You want to be exposed properly for the colored sky and have you and your friends and family as silhouettes in front of the lit horizon and the eclipsed Sun in the sky. Set the camera up behind you and your group predicting that the eclipsed Sun will be in the field of view above you (that bodies won't' be in front of it). Remember NO FLASH!
So here is what you do now, to practice and be prepared. Go out on a clear day in a spot with a low Western horizon and have a camera with a wide angle lens set on manual mode. Choose a medium to tight aperture so you have a long depth of field. Choose a medium ISO for good sensitivity and low noise (approx 800). Let the Sun go over the horizon. Wait about 20 minutes and meter the sky brightness for a starting point for your shutter speed. Wait about 5 minutes more (25 minutes after the Sun went down) and take a set of bracketed exposures (maybe 2 on each side of your metered exposure). Then do it again, in about 2 to 3 minutes. Then do it again and again for about 10 to 15 minutes after the first set of images you took. Then look at you images on your computer and pick an exposure (by shutter speed) in the middle, that has a nice exposure of the sunset sky colors and write down that shutter speed (or range of shutter speeds). During this time after sunset, about 25 to 35 minutes after the Sun goes over the horizon, is how the lighting of the sky and the horizon looks during totality. But is like a dome, with the darkest part being above you and then all around (360 degrees) it is lit. use the shutter speed that you wrote down to try to set up a camera that will do all of the shutter releases and the bracketing automatically.
Remember NO FLASH!

Copyright 2002 - 2019 Gordon Telepun and Foxwood Astronomy, LLC
Solar Eclipse Timer and the Solar Eclipse Timer logos are Resistered Trademarks of Gordon Telepun.
The Solar Eclipse Timer banner art and all other art related to the Solar Eclipse Timer website and mobile applications are protected by copyright.